Ball Toss Fix for the Serve
First published on 9-09-2009. Bookmark & share
by Randy Lynn Rutledge - a previously certified USPTA Tennis Teaching Professional
( Note: retired in good standing, but stopped making USPTA dues payments )
( Note: retired in good standing, but stopped making USPTA dues payments )
An accurate tennis service needs an accurate ball toss.
This article describes a basic service stance, two ways to teach the ball toss, and a way to teach the throwing motion for a relatively flat tennis service.

|
A tennis service begins when the ball is tossed. Multiple footwork steps during a service are not allowed until the string-to-ball contact has happened; therefore, it is critical for the ball toss of any serve to arrive on time to meet the racquet strings at an exact point within the path of a service stroke.
|
Service Stance
The service toss and the service motion begin from a stationary position. A stance for a relatively flat service (no intentional spin) is easy to find:
Step 1). Stand a couple of inches behind the baseline and draw an imaginary line between the service target and yourself.
Step 2). Turn the dominant shoulder away from the target until both feet are parallel to an imaginary line between the service target and yourself.
Step 3). Turn your body to a position about 45 degrees away from parallel to the net. Adjust your front foot to the approximate direction of the net post. Adjust your back foot to aim at the sideline at approximately 6' to 12' from the baseline. Adjust your toes until an imaginary line draw across them aims in the general direction of the target.
Step 4). Test your stance by shifting your weight back and forth to allow the toe of the front foot to come off of the court surface when all of your weight is shifted to the back foot and to allow the heel of the back foot to come off of the court surface when all of your weight is shifted to the front foot. Make any necessary adjustments for comfort and balance.
The Ball Toss
Teaching the Ball Toss
I am listing the progressions for two methods with which I have had positive results.
I am listing the progressions for two methods with which I have had positive results.
Sending a Tennis Ball Up to Kiss a Leaf of a Tree - (Method 1)
The ball toss for a flat serve normally varies in height within a range between the height of the sweet spot and two to four few feet above the tip of an up-stretched tennis racquet. The height of your toss should be determined by the length of your service motion and the time it takes for the racquet sweet spot to arrive at an on-time string-to-ball contact point within the stroke. Experiment with ball height and racquet speed to get a feel for the necessary ball toss height variations to match different speed and stroke variations.
The ball toss for a flat serve normally varies in height within a range between the height of the sweet spot and two to four few feet above the tip of an up-stretched tennis racquet. The height of your toss should be determined by the length of your service motion and the time it takes for the racquet sweet spot to arrive at an on-time string-to-ball contact point within the stroke. Experiment with ball height and racquet speed to get a feel for the necessary ball toss height variations to match different speed and stroke variations.
Use an up-stretched tennis racquet to approximate the racquet string-to-ball contact point and find a leaf on a branch of a tree which is one or two feet higher. If you are unsure how high the ball toss needs to be, practice a higher toss than what you think you might need. It will be easy enough to reduce the height of your ball toss as required.
Look to an imaginary target and mark your approximate toe positions for a solid stance (as described in the section above). Trial and error will allow the student to find a proper height to let go of a tossed ball so that it will peak at the target leaf and fall down slightly in front of the dominant shoulder.
The description of a second method to teach the ball toss follows:
Teaching the Ball Toss - (Method 2) - A Three-Step Method (against a fence - between fence posts)
|
Measuring an Approximate String-to-Ball Contact Point
Step 1). Student stands parallel and reaches a full arm length forward to place the palm of the dominant hand against the surface of the fence. Position the feet at shoulder width apart.
|
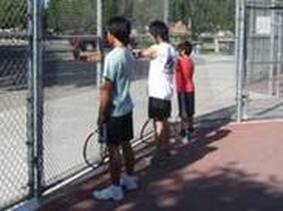
Welby, Austin, & Andrew (July 1, 2010)
|
|
Step 2). Maintain the toe position of the foot below the tossing hand while adjusting the other foot to turn the dominant shoulder 45 degrees away from the fence
Step 3). Raise the tennis racquet as high as possible to a position of less than one foot away from the fence. Use the entire body to gently trap any ball tossed in front of the sweet spot and close to the fence as it rises.
|
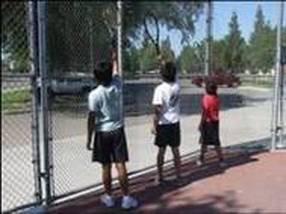
Shoulders 45 degrees away from parallel with fence.
|
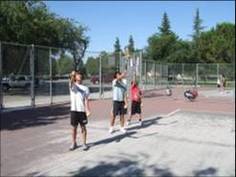
Measuring the Contact Point - A Three-Step Method (at the baseline)
The student is moved from the fence to the baseline of the tennis court where he or she repeat the method they used to find their service stance at the fence. This shows them approximately how far forward their ball toss will need to be to successfully execute a flat serve, while using a medium racquet head speed.
|
1. Outstretched arm measures contact point
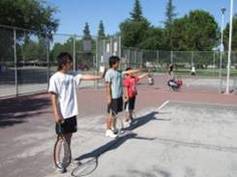
Austin, Welby, & Andrew (July 1, 2010)
|
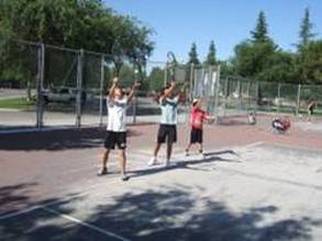
2. Feet & shoulders turn 45 degrees from net
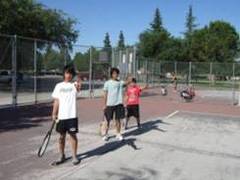
Austin, Welby, & Andrew (July 1, 2010)
|
3. Raise racquet to find string-to-ball contact
Austin, Welby, & Andrew (July 1, 2010)
|
|
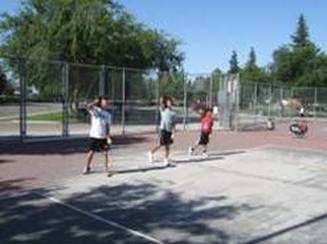
The student measures the string-to-ball contact point and continues practicing with the racquet moved back two feet behind that point. The ball toss will be a little higher and the ball will be struck on the way down.
Use a slight bevel and just enough racquet head speed to propel the tennis ball into the service box. Stop the racquet as soon as the ball is off the strings.
|
Austin, Welby, & Andrew (July 1, 2010)
|
This service practice drill gives the student a method to isolate the ball toss and point of contact out of the progressions of an entire service motion. Practice this drill until control of the ball toss is gained.
|
Practice the Serve from the Back-Scratch Position
Have the student start the serve from the back-scratch position. The elbow is raised and the tennis racquet hangs behind the back. The follow through is brief until a high rate of success is attained.
|
Austin, Welby, & Andrew (July 1, 2010)
|
Toss the Ball Up into the Bounds of an Imaginary box

Fix a bad toss.
|
Do not change the service motion to accommodate a bad ball toss.
Maintain a repeatable service motion.
Use a natural tennis swing which mimics a throwing motion. Time the ball toss to find the sweet spot of the tennis racket within the service motion.
|
|
Find the location of an imaginary ball toss boundary box by using a super slow-motion tennis racquet service motion.
|
Stop the tennis racquet when the "eyes" of the racquet face can "see" the desired path of the ball flight for the type of service motion to be used.
Use trial and error to accurately position the ball toss within the ball toss boundary box.
Program a good ball toss to match the desired string-to-ball point of a good tennis service motion by using an imaginary, 6-inch square, ball toss boundary box.
|
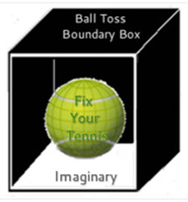
Imaginary 6-inch square ball toss boundary box.
|
A good string-to-ball contact point requires that every ball toss be within the boundaries of an imaginary 6-inch square box during match play. The imaginary box shows the forward and backward boundaries, the left to right boundaries, and the correct height for a ball toss of an ideal service stroke. Do not hit a bad toss during match play.
Practice making opposite ball toss errors. Find a correct string-to-ball contact location between two opposite errors.
Ball Toss Error Opposite Error
Ball toss is too far forward. .........Toss the ball too far back.
Ball toss is too far back.................Toss the ball too far forward.
Ball toss is too far to the left. ......Toss the ball too far to the right.
Ball toss is too far to the right. ....Toss the ball too far to the left.
Ball toss is too low.........................Toss the ball too high.
Ball is too high ...............................Reduce the height by a few inches at a time.
Note: Do not use a too low toss to fix a too high ball toss.
Teaching the Throwing Motion
Before attempting to teach the service motion to a tennis student, I take out an old, string-less, tennis racquet and teach the student the throwing motion in the grass of the park, just beyond the tennis courts.
|
Aim the Tennis Racquet at a Target
The student maintains a stance for a flat service. Position the body weight over the front foot. Stretch the tennis racquet and the tossing hand toward the primary target (net clearance). The back foot is ready to receive most of the body weight and then return the weight forward for a farther throw. |
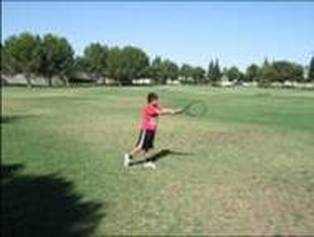
Andrew (July 1, 2010)
|
|
Body Weight Moves Back to Load the Back Leg with Ground Force
The weight is transferred to the back foot and the back knee bends slightly. The student pushes off and moves up and forward. The tennis racquet moves away from the target and will be returned directly toward the target during the throwing motion. An imaginary tennis ball is tossed. Seeing the "ball" at contact is vital during this practice.
|
Andrew (July 1, 2010)
|
|
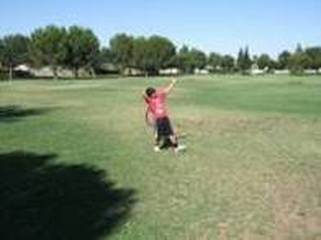
Weight Transfers Up and Forward To Release the Racquet
A good throwing motion has been developed when the tennis racquet is released and travels up and forward at about a 45 degree angle. It is important that the throwing motion propels the student forward and that good balance is maintained throughout the motion. The distance of each throw is marked only when the tennis racquet lands closer to the target than the last throw. The throwing motion is repeated until height, angle, and distance become relatively uniform. Feedback is given to the racquet thrower to improve parts of the throwing motion.
|
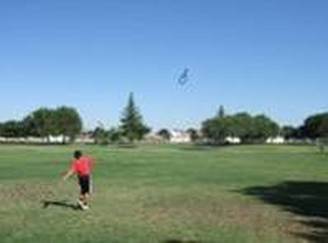
Andrew (July 1, 2010)
|
